Chaoscope - Transparent Background
The following tutorial describes how it is possible to create a transparent background for a Chaoscope version 0.3 render. I am using Paint Shop Pro (Version 8) for doing this. If your grafic program allows the usage of layers and mask layers, it should be possible to transfer the steps to other grafic programs too.
You can download Chaoscope from the following homepage:
Chaoscope Home .: Start Chaoscope :. After starting Chaoscope, we see that the interface might be in French. If you can speak French very well this should be no problem for you. All others should select the menu Fichier and then the submenu Options.... The paragraph Langue allows you to select English from a list. You have to restart Chaoscope then. Create a new attractor by pressing the keys [CTRL]+[N]. Now a dialogwindow opens. 
I've chosen 'Julia' as the Attractor because it makes for very nice results. Choose Solid as the Render mode (this is important because only this mode allows you to save your image as an opacity mask). .: Here we go :. The preview window is still empty so we are going to change this by pressing the [F3] key. Now we see a preview of our attractor. Maybe we have to repeat this until we've obtained a satisfying result. You can also carefully change the values within the Attractor window. Now we change the colors. Here we encounter a difference with older versions of Chaoscope. It is possible to set 5 different colors. You can play around with these parameters as you please. 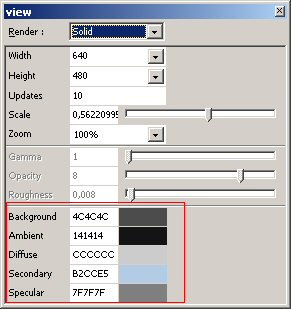
I suggest that you make a test render from time to time (press the [F4] key) to see how the colors will look. You can cancel the render process anytime by pressing the [Escape] key. End of Page 1 »Top«If everything looks all right you can finaly render your picture. How long the render process will take depends on the value you have set for the number of iterations. A high value (much higher than the default value 20000000) will produce a much better result but it also requires more time to render. If the render process is finished you have to carry out the following steps: Select the drop-down menu File and choose the entry Save image as.... Enter a name and save your picture. Use "Bitmap 24 Bits" as file type. 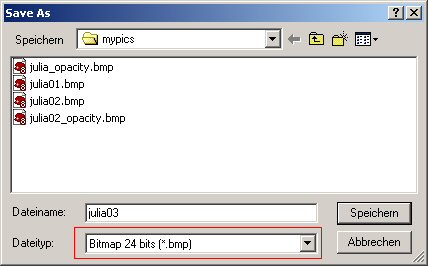
Then select the drop-down menu File again and again choose the entry Save image as.... Enter a name again (though not the same as before). This time use Opacity Mask as the file type. I suggest that you also use the word "opacity" within the filename. 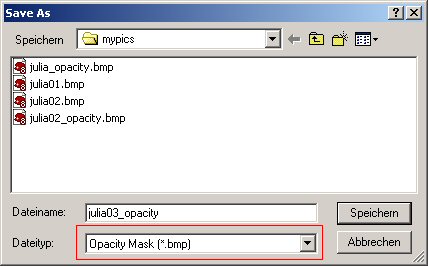
After this we can leave Chaoscope. End of Page 2 »Top«Note: I use a German version of Paint Shop Pro but I try to guess the right English labeling After we've open Paint Shop Pro we load the two pictures we've just created. We duplicate the background layer of our original chaoscope picture (not the one we've saved as an opacity mask picture) and select the duplicated layer than. Select the menu Ebenen (Layers?) and choose the entry Neue Maskenebene (new mask layer?). Then select the entry Aus Bild (from picture?)... 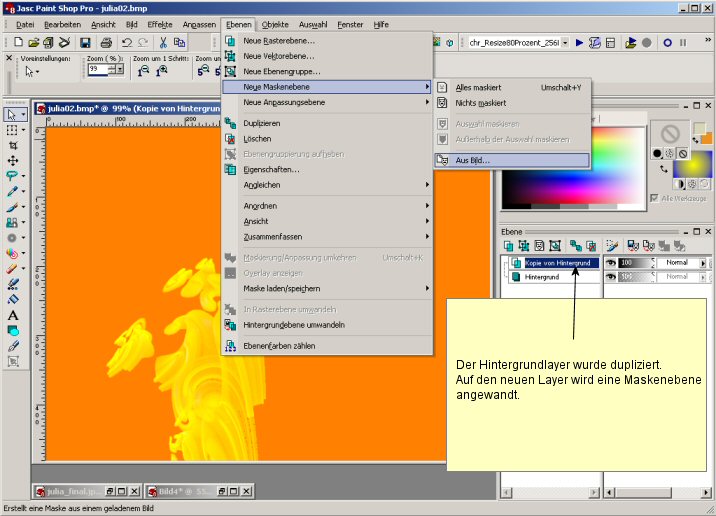
Now we select the file we have saved as an opacity mask. 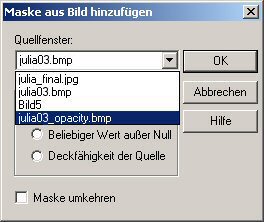
End of page 3 »Top«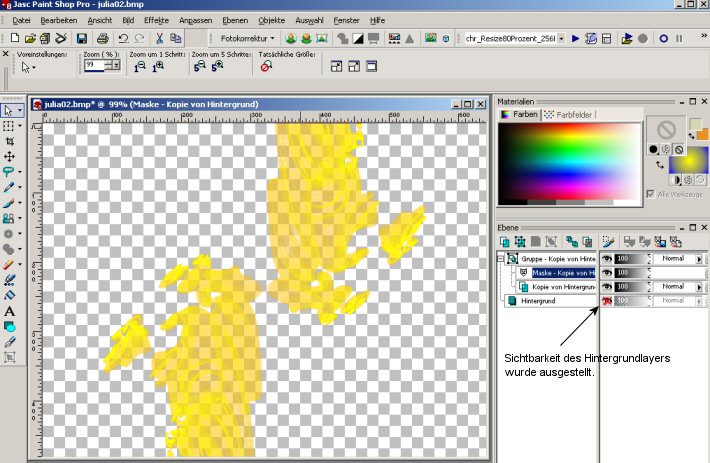
We can create a new layer now and fill it with a color gradient for example (Note that the new layer has to be placed before the layer group which contains the mask). The rest is up to you. I suggest that all new layers should be placed before the layer group which contains the mask. End of page 4 »Top«Normal Solid Render 
After the tutorial 
I hope you've found this tutorial useful.
I would be happy to receive every kind of feedback from you.
X-PaXEnd of page 5 »Top« |
||||